Archinature
707-322-5519
Jon@archinature.com
http://www.archinature.com
|
Rendering Examples:
Please Note: this is only a very small listing of the renderings that have been worked on.
Some are very recent and some are several years old with the amount of detail often seen in
the rendering being representative of pushing the computing power at the time they were created to the limits.
Alll included images are shown as examples of possible rendering techniques and types of renderings possible.
Click on the images to the left to view more about them on the right and to see larger versions.
Click on the images on the right to see much larger versions. However, due to file size they may load slow depending upon your connection speed.
Let us know if there is a particular type of rending that you are looking for as an example of our work if it's not seen below.
How We Render:
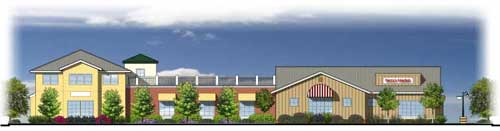
| There are various types of renderings. The easiest and quickest to create is a 2d rendering. The image at the right here is an AutoCAD elevation from the architect that had "shadows" placed on the image. These are faked in to look realistic. The AutoCAD drawing is layered with the color information and then taken into Photoshop through M-Color to have cars, trees, shrubs, people and background sky put into the rendering. The shadows are also layered so the colors can be quickly and easily changed to create multiple versions on the fly. Typically this style of renderings can take between 4 to 8 hours depending on the complexity, number of colors, and amount of entourage placed into the image. I can also layer in real photos of actual site pictures as well given a little extra time. |
 |
|
|
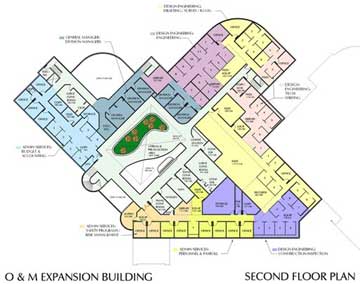 |
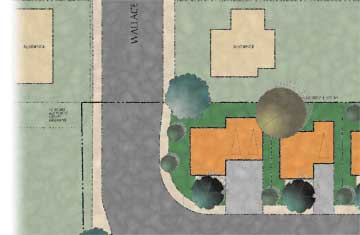
We can also take a 2d floor plan or site plan from AutoCAD and layer color on them to generate a schematic plan. This can usually be done within a couple of hours, however the more complicated the floor plan, the more time consuming the process is. Site plans are often more time consuming but we can also apply trees and other items to make a better image. Typically a key legend of the colors is inserted off to the side of the image for reference. All images can be plotted to 11x17 on good quality ink jet printers or scaled down for online presentations. If you will need larger images such as 24x36, let us know at the start of the project so we can be sure the required data is available for larger sizes. Keep in mind that color will vary from printer to printer, from screen to screen and even changing paper will cause the color to appear different, sometimes vastly different. When viewed under different lighting conditions the colors will also change as well. This image was done in approximately 12 hours, including both floors, the key and numerous changes per the client. |
|
|
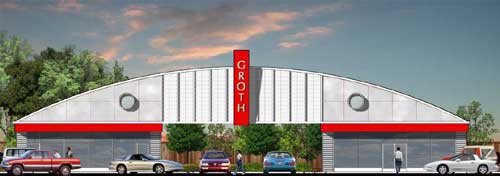
| Should the client not have AutoCAD or cannot create a CAD drawing of the elevation, the hand drawing can be scanned into the computer and then I can apply color, texture and lighting effects. If there are real background photos such as seen here, they can be applied as well. This process can be more cost effective to the client than traditional hand created color renderings since once in the computer the colors can be easily adjusted, multiple versions can be created on the fly, different backgrounds can be used or even different plant styles can be used. This image was created in about 4 to 5 horus. |
 |
|
|
 |
With renderings we can apply various effects to soften the image to give it a more hand created look that some clients prefer. This can include jagged lines, blurring lines and variegating the colors so the colors are not the typical flat colors often scene in computer images. Finally, once the image is adjusted then we can apply a paper texture to make it look like it's been done on water color paper, plaster, woven material or many other types textures. This site plan was done in about 4 hours. |
|
|
| When creating a rendering, often I can use real images supplied by the client of real world objects. In this example, the bricks and awnings are created from actual material images. |
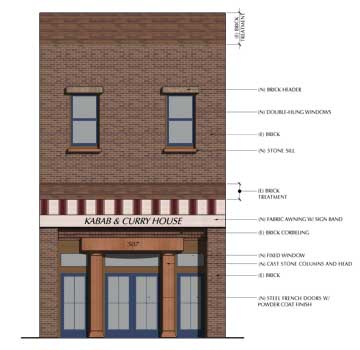 
rendering / original photo from client
|
|
|
 |
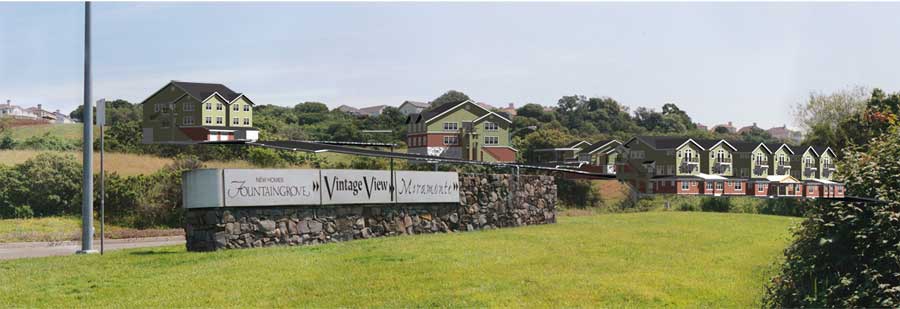
When we get into 3d renderings, the time goes up quite substantially. Often a 2d rendering can do the work for far less money and time. Sometimes however a 3d rendering is required. This is a good example. The client wanted to show his client that their signage would be viewable from a specific location as customers would drive past. Here the sign was created in 3d, imported into Photoshop where plants are placed around the sign. A trip to the actual location for photos and camera matching to make it all come together. This image has been cropped to highlight the montage. |
|
|
On a good day, when you montage you have a complete image to work from for either the foreground or background. In this image the background & foreground was montaged from numerous pictures and there was some trash and signs that were deleted from the foreground for a better image. About 16 photos were combined to create this one complete "photo" that will be the base for the rendering
|
|
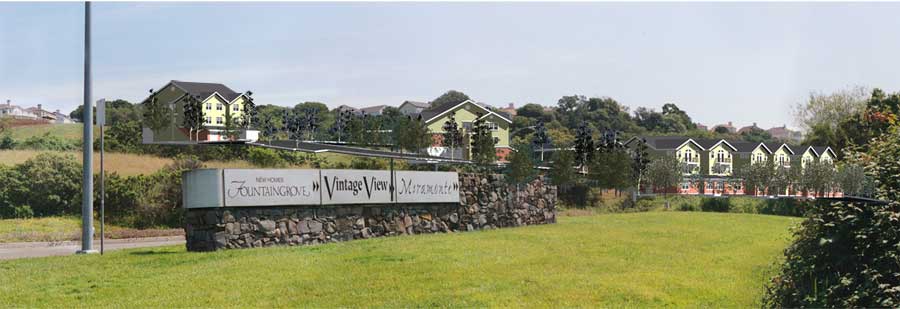
In the second image we have taken the 3d model that was created, applied textures and lighting, set up a camera to match closely as possible the real world camera and had the computer generate the rendering. This has been cropped out and inserted into the photo.
|
|
In the third image we have added trees and plants to the rendering. These are usually a combination of rendered plants and real world photos of plants.
|
|
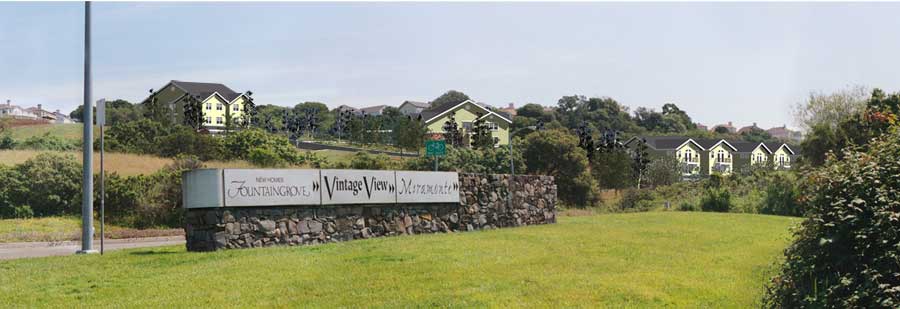
The forth image shows how we've copied parts from the background photo of elements such as plants, grass and trees to the foreground to create the look of the buildings sitting in the landscape properly.
|
|
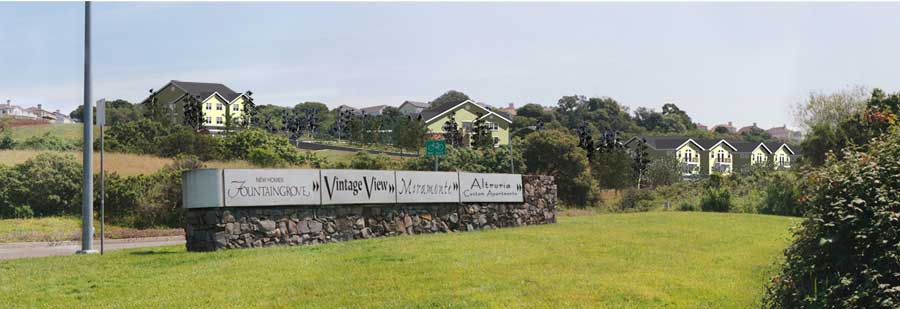
In the final image you can see everything put together for a complete rendering. As an added bonus, the signage for the projects has been added into the image as if it was built and advertising the project for prospective buyers.
|
|
|
|
|
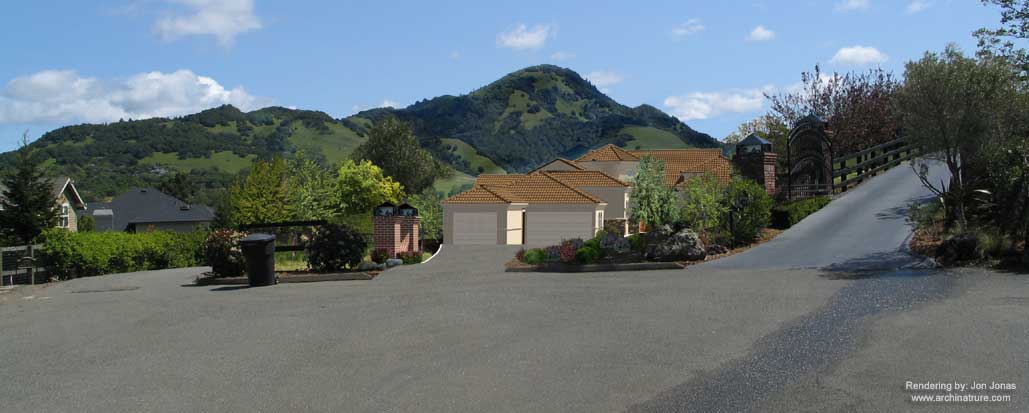 |
The most time consuming aspects of rendering in 3d is to create an image that looks real. To do this there needs to be a balance between images applied to the model versus actual physical models, the right amount of detail and camera matching. Keeping this in mind, the image seen here has all the most difficult items in it - a hillside environment, Spanish tile roofing which only looks right when fully modeled, an actual photo that needs the camera in the computer to match the real world camera position, multiple background images stitched together, foreground objects in the photos removed, foreground plants to be rotoscoped (cut around to make them appear in front of the rendered image) and light matching. Often, renderings like this one can take upwards of 45 hours to complete. When rendering in 3d the time that the computer takes to generate the actual image also has to be taken into account and the larger the final image needs to be, the longer the computer needs to generate the data. For example, doubling the size from 11x17 to 24x36 will take four times as long to render. Even in this day of very fast computers with gobs of RAM, that can be 8+ hours on a complicated model. In this image you cannot see all the detail in the model due to the image having been scaled down for viewing online. |
|
I do various styles of renderings using several different software packages. Generally unless a client needs a 3D model with the site and a photomontage of their project, I can do a cost-effective 2D rendering which results in a very life-like feel for the building using existing 2D elevations from the architect. I add shadows, plants, cars, people and backgrounds to populate the scene. While generally a 3D rendering will run $1500 or more and take several days to produce, a 2D rendering will take about half a day and run typically in the range of $250 to $500. Also, the 2D renderings are not simply limited to renderings but can also be used very effectively for doing site plans or schematic floor plan layouts. Numerous projects that I have done have been highlighted at the Motivesys.com website who make some of the software that I use to generate my images. However, if 3D is what you need we use AutoCAD primarily with Accurender to produce your model and do post processing in Photoshop. The rendering I created for the local teen center has been seen in the local news paper and is used in most of their publicity flyers. For a price quote for a rendering, please contact me with detailed information for what you are looking for.
|
|